[Heatic 2+] Battery Replacement Guide
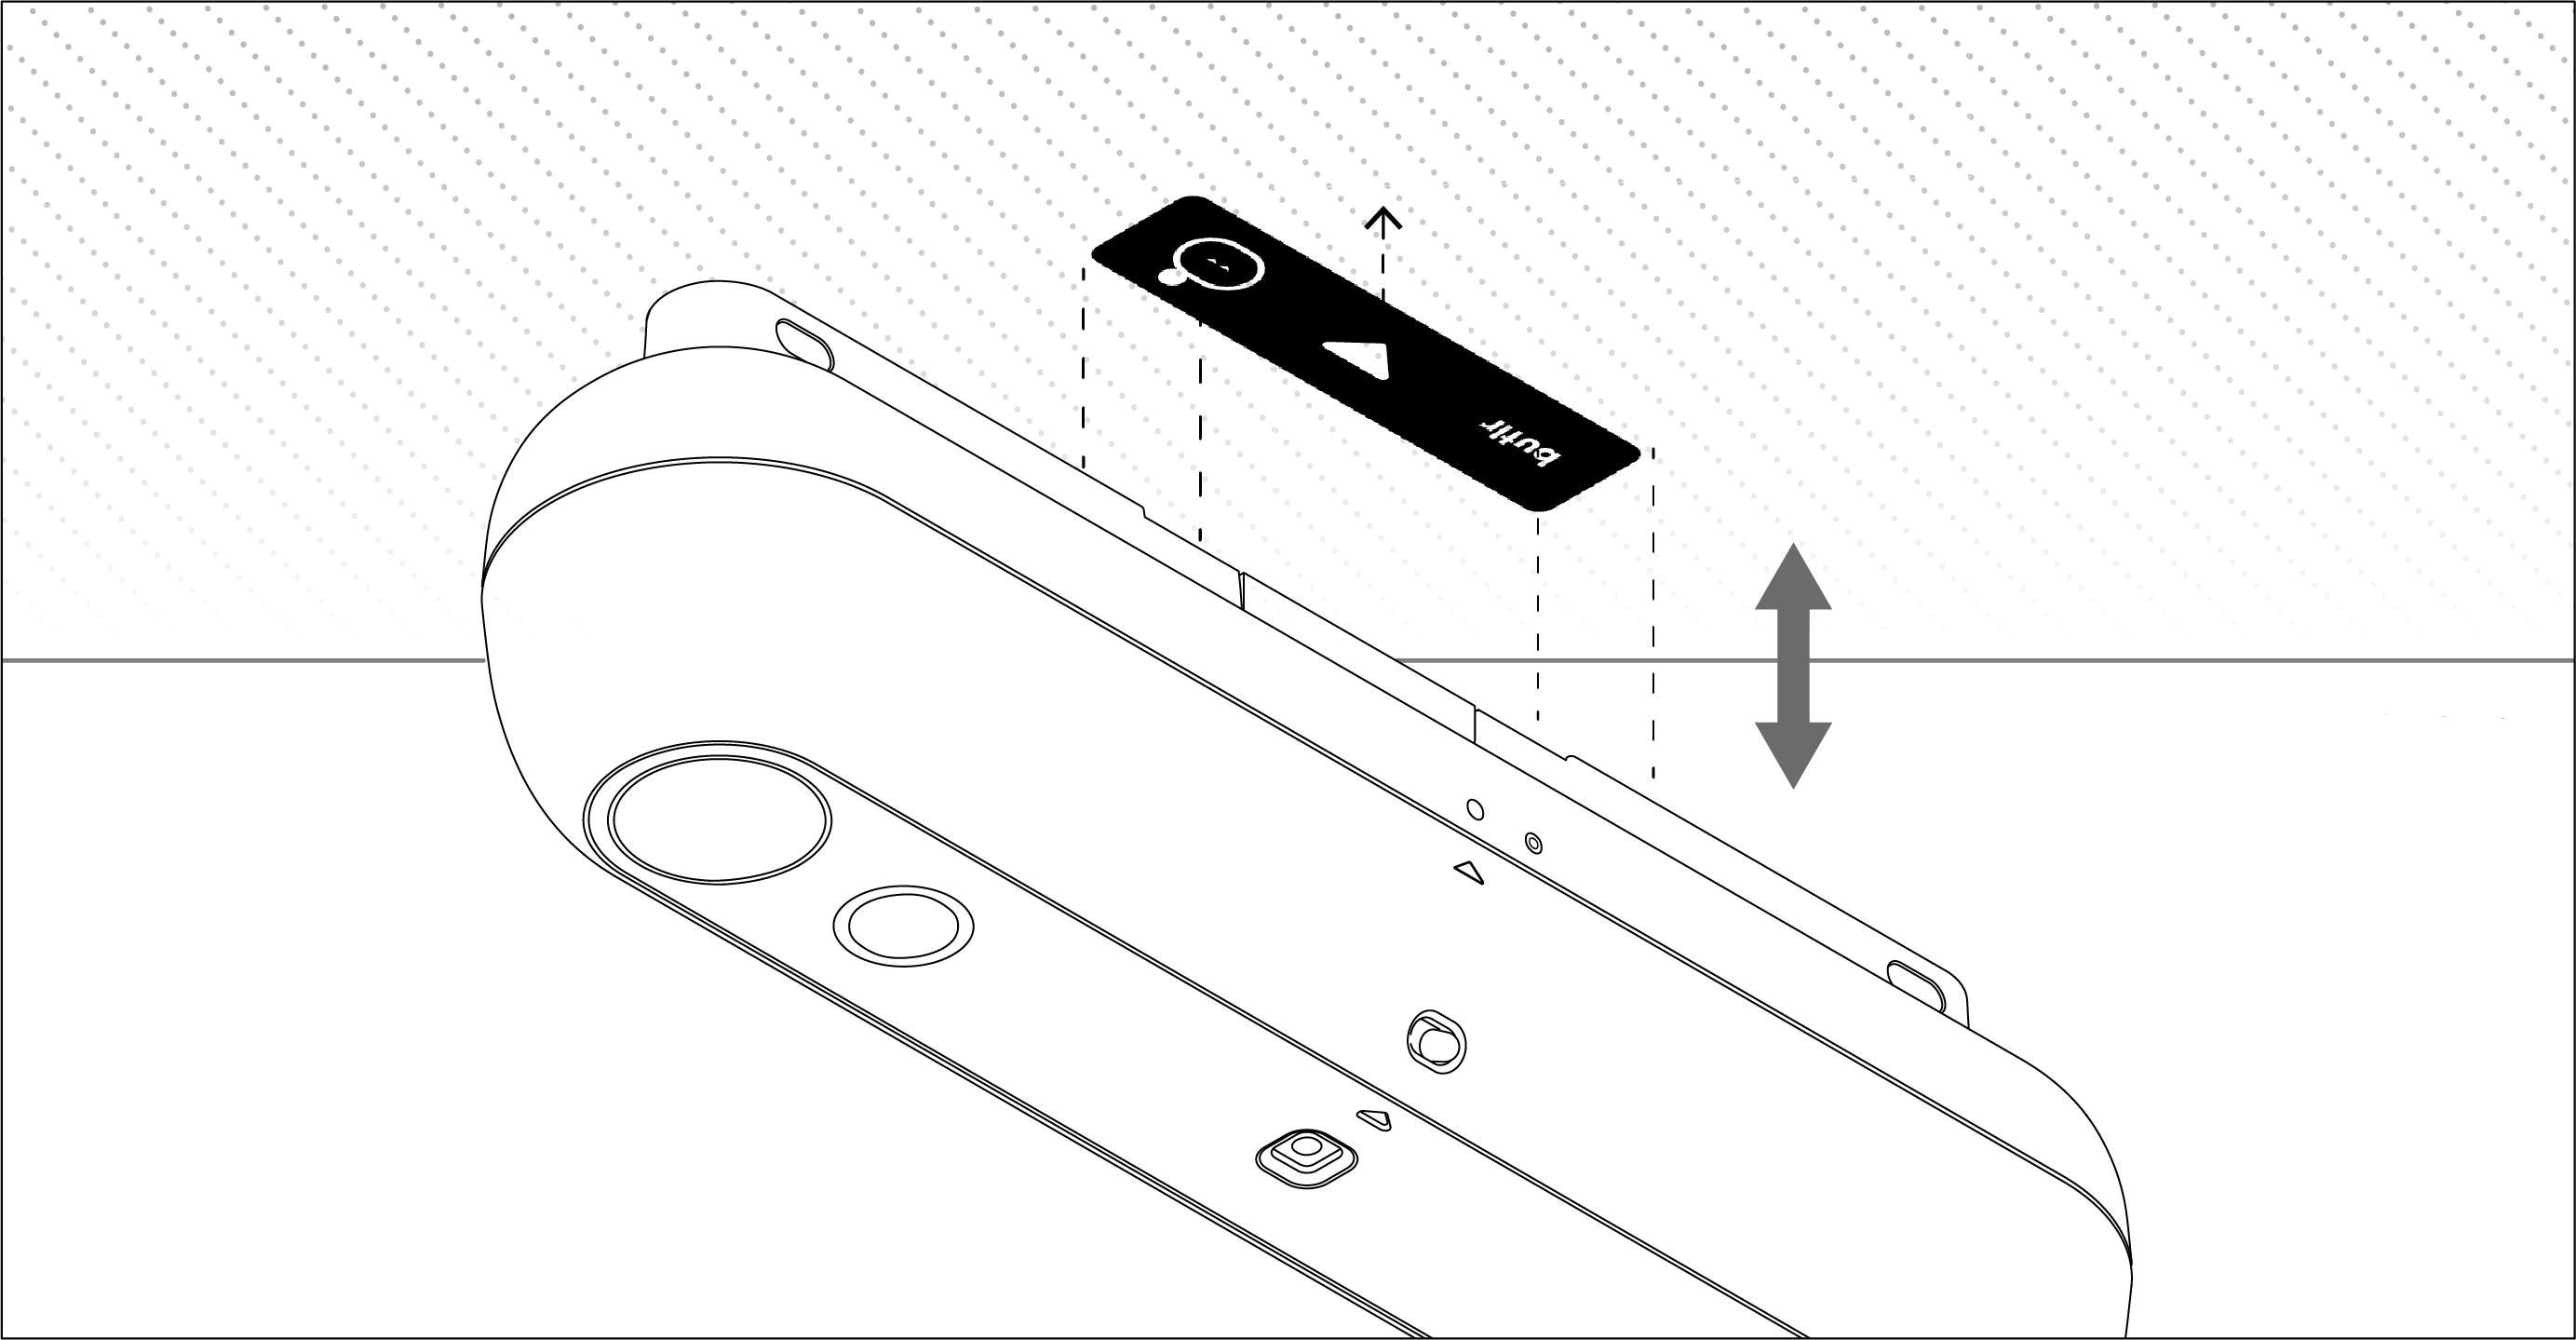
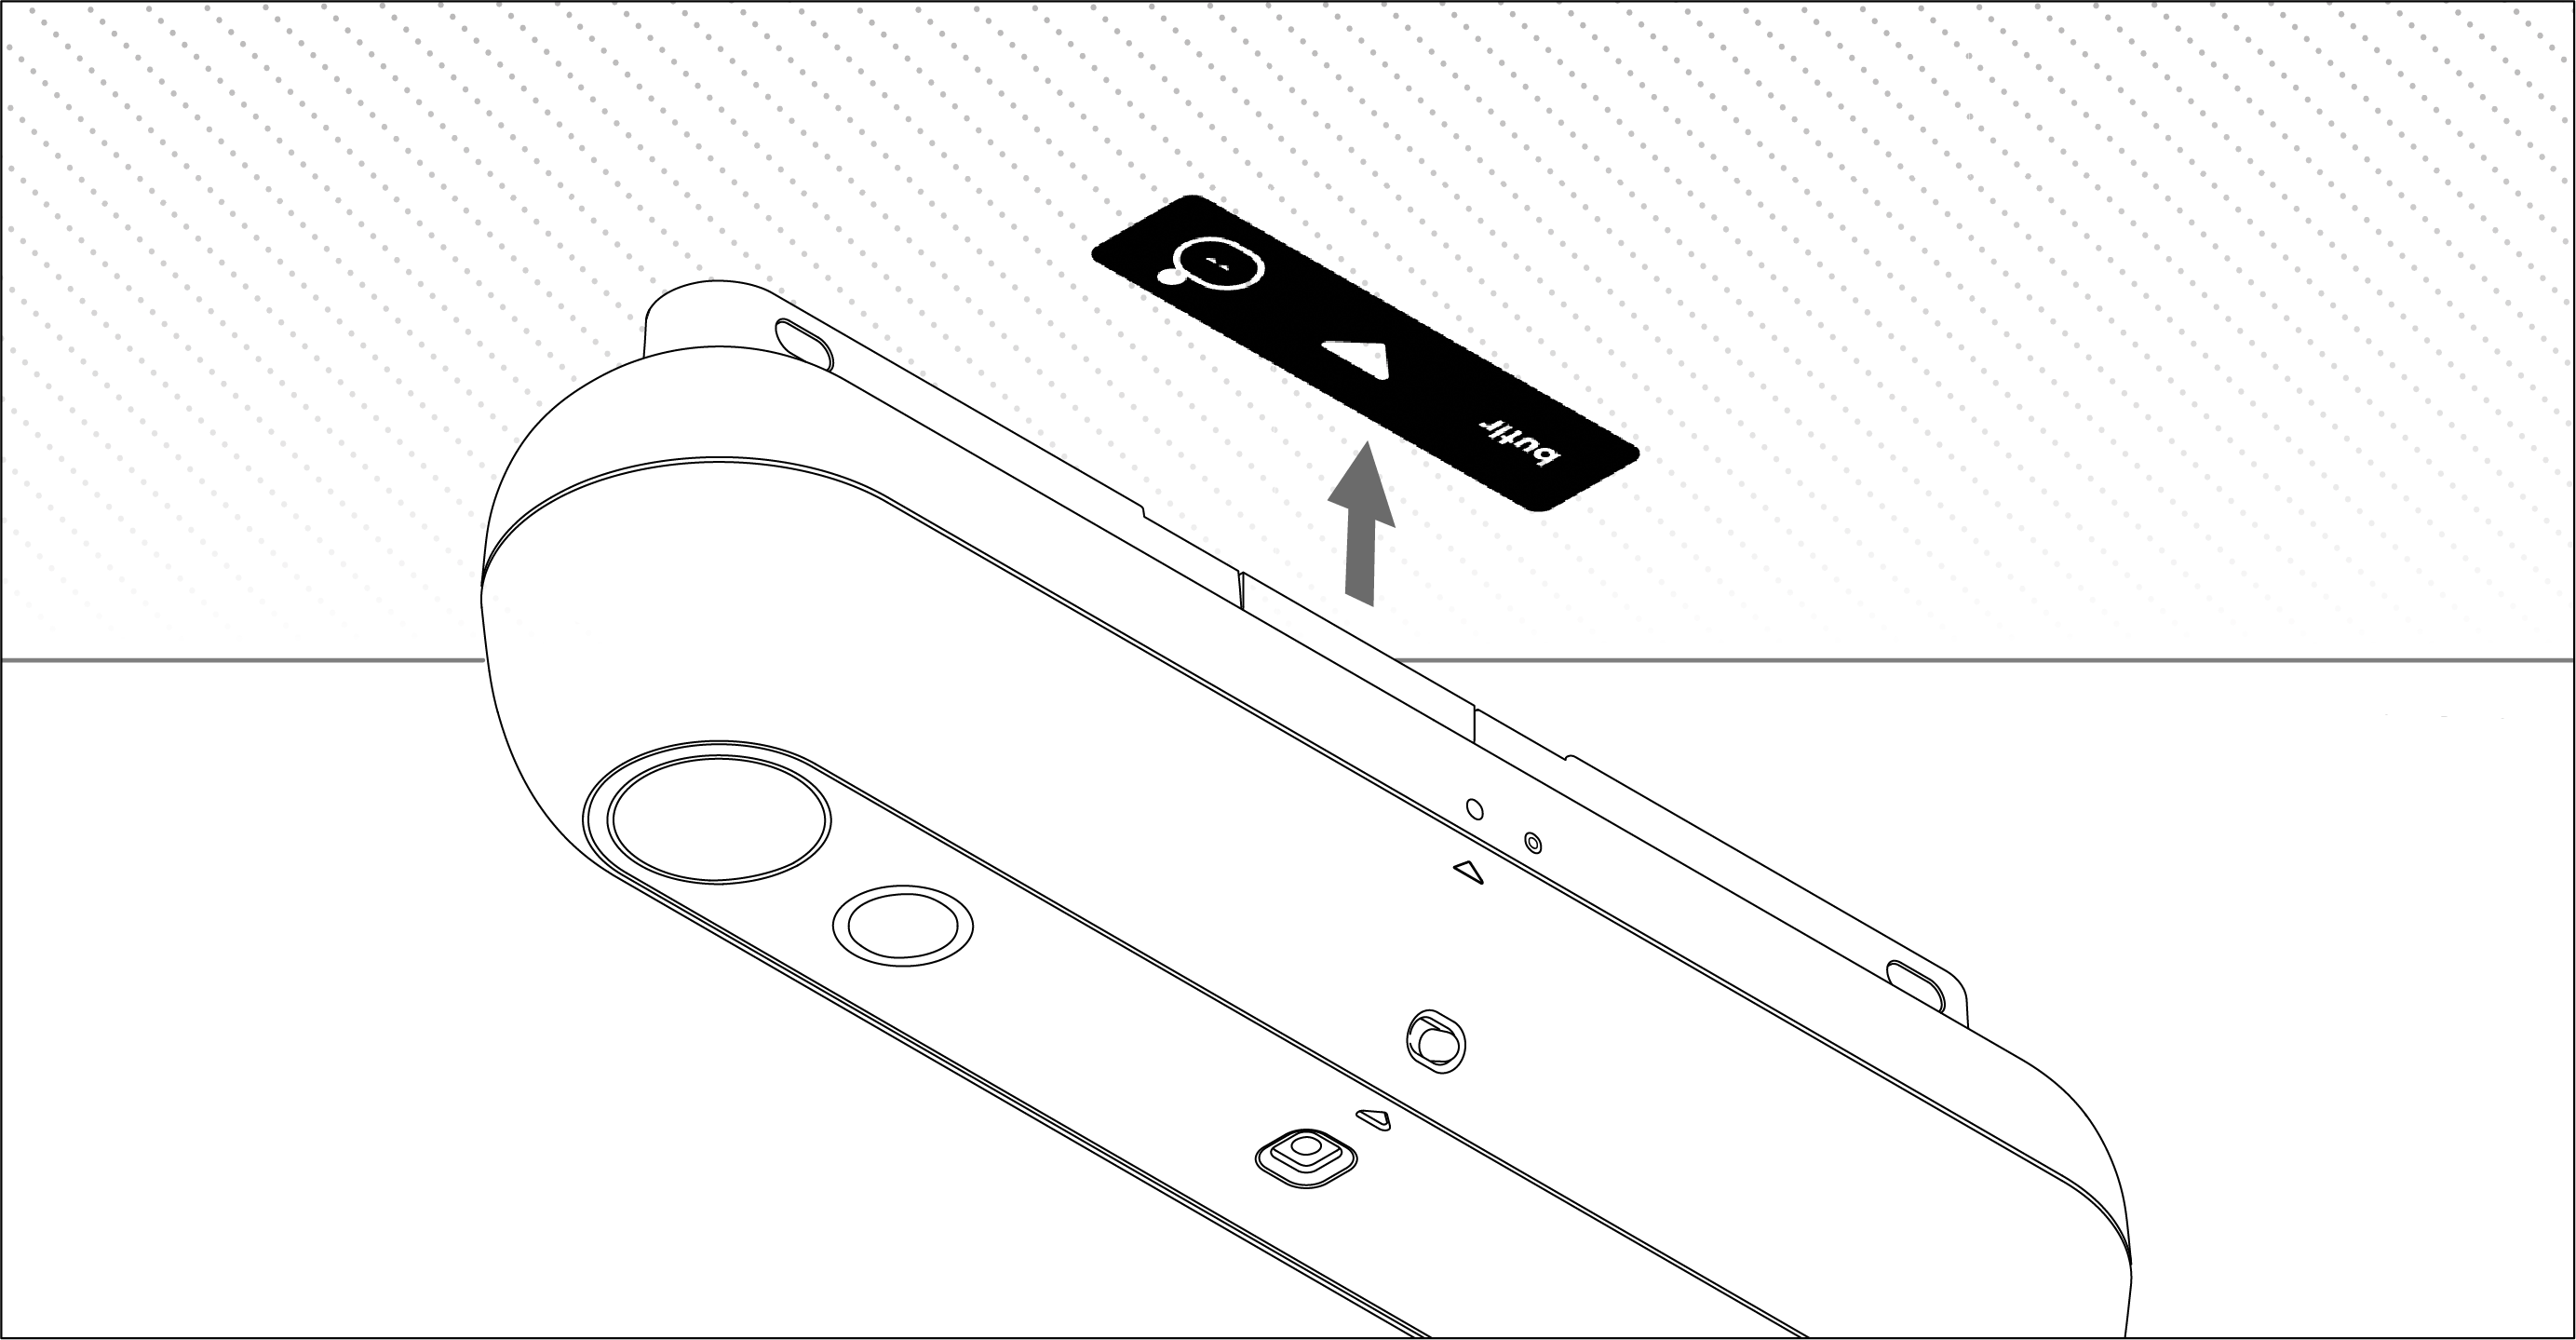
For Heatic 2+ sensors magnetically attached to the ceiling, Wall Mount, or Ceiling Mount (without screws):
- Carefully detach the sensor from its mounting surface.
- If no orientation sticker is present, mark or note the original orientation and location of the sensor.
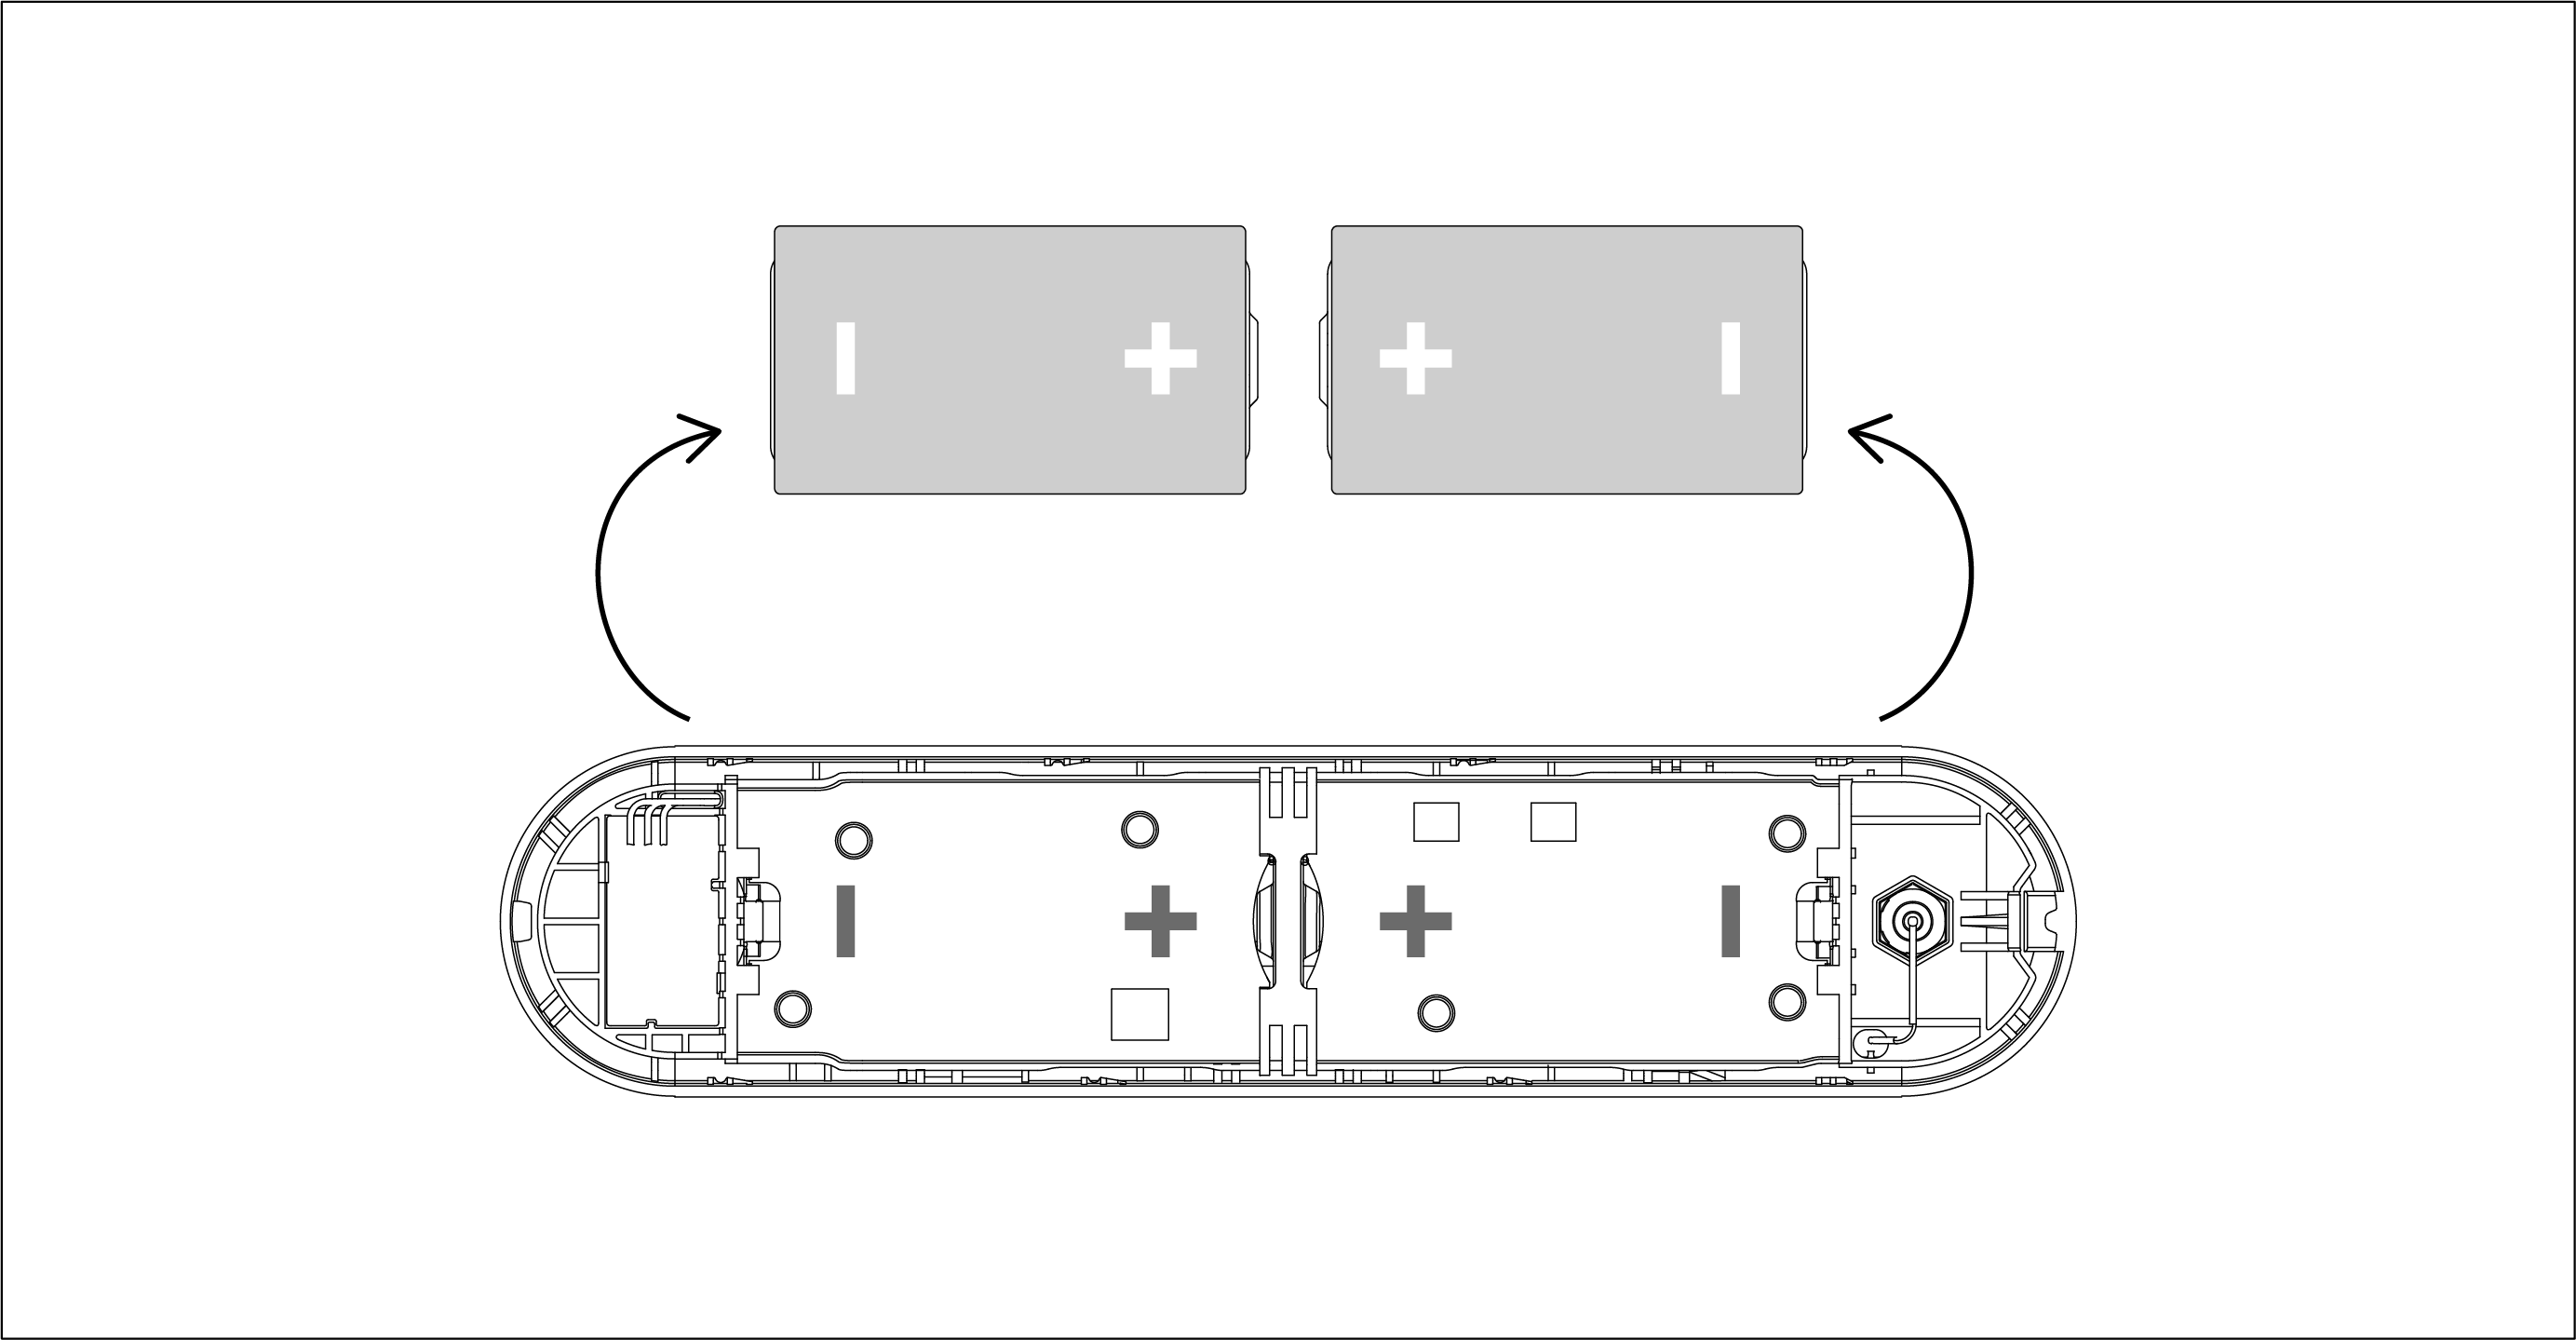
- Replace the batteries in the battery housing.
- Reattach the sensor in its original location and orientation.

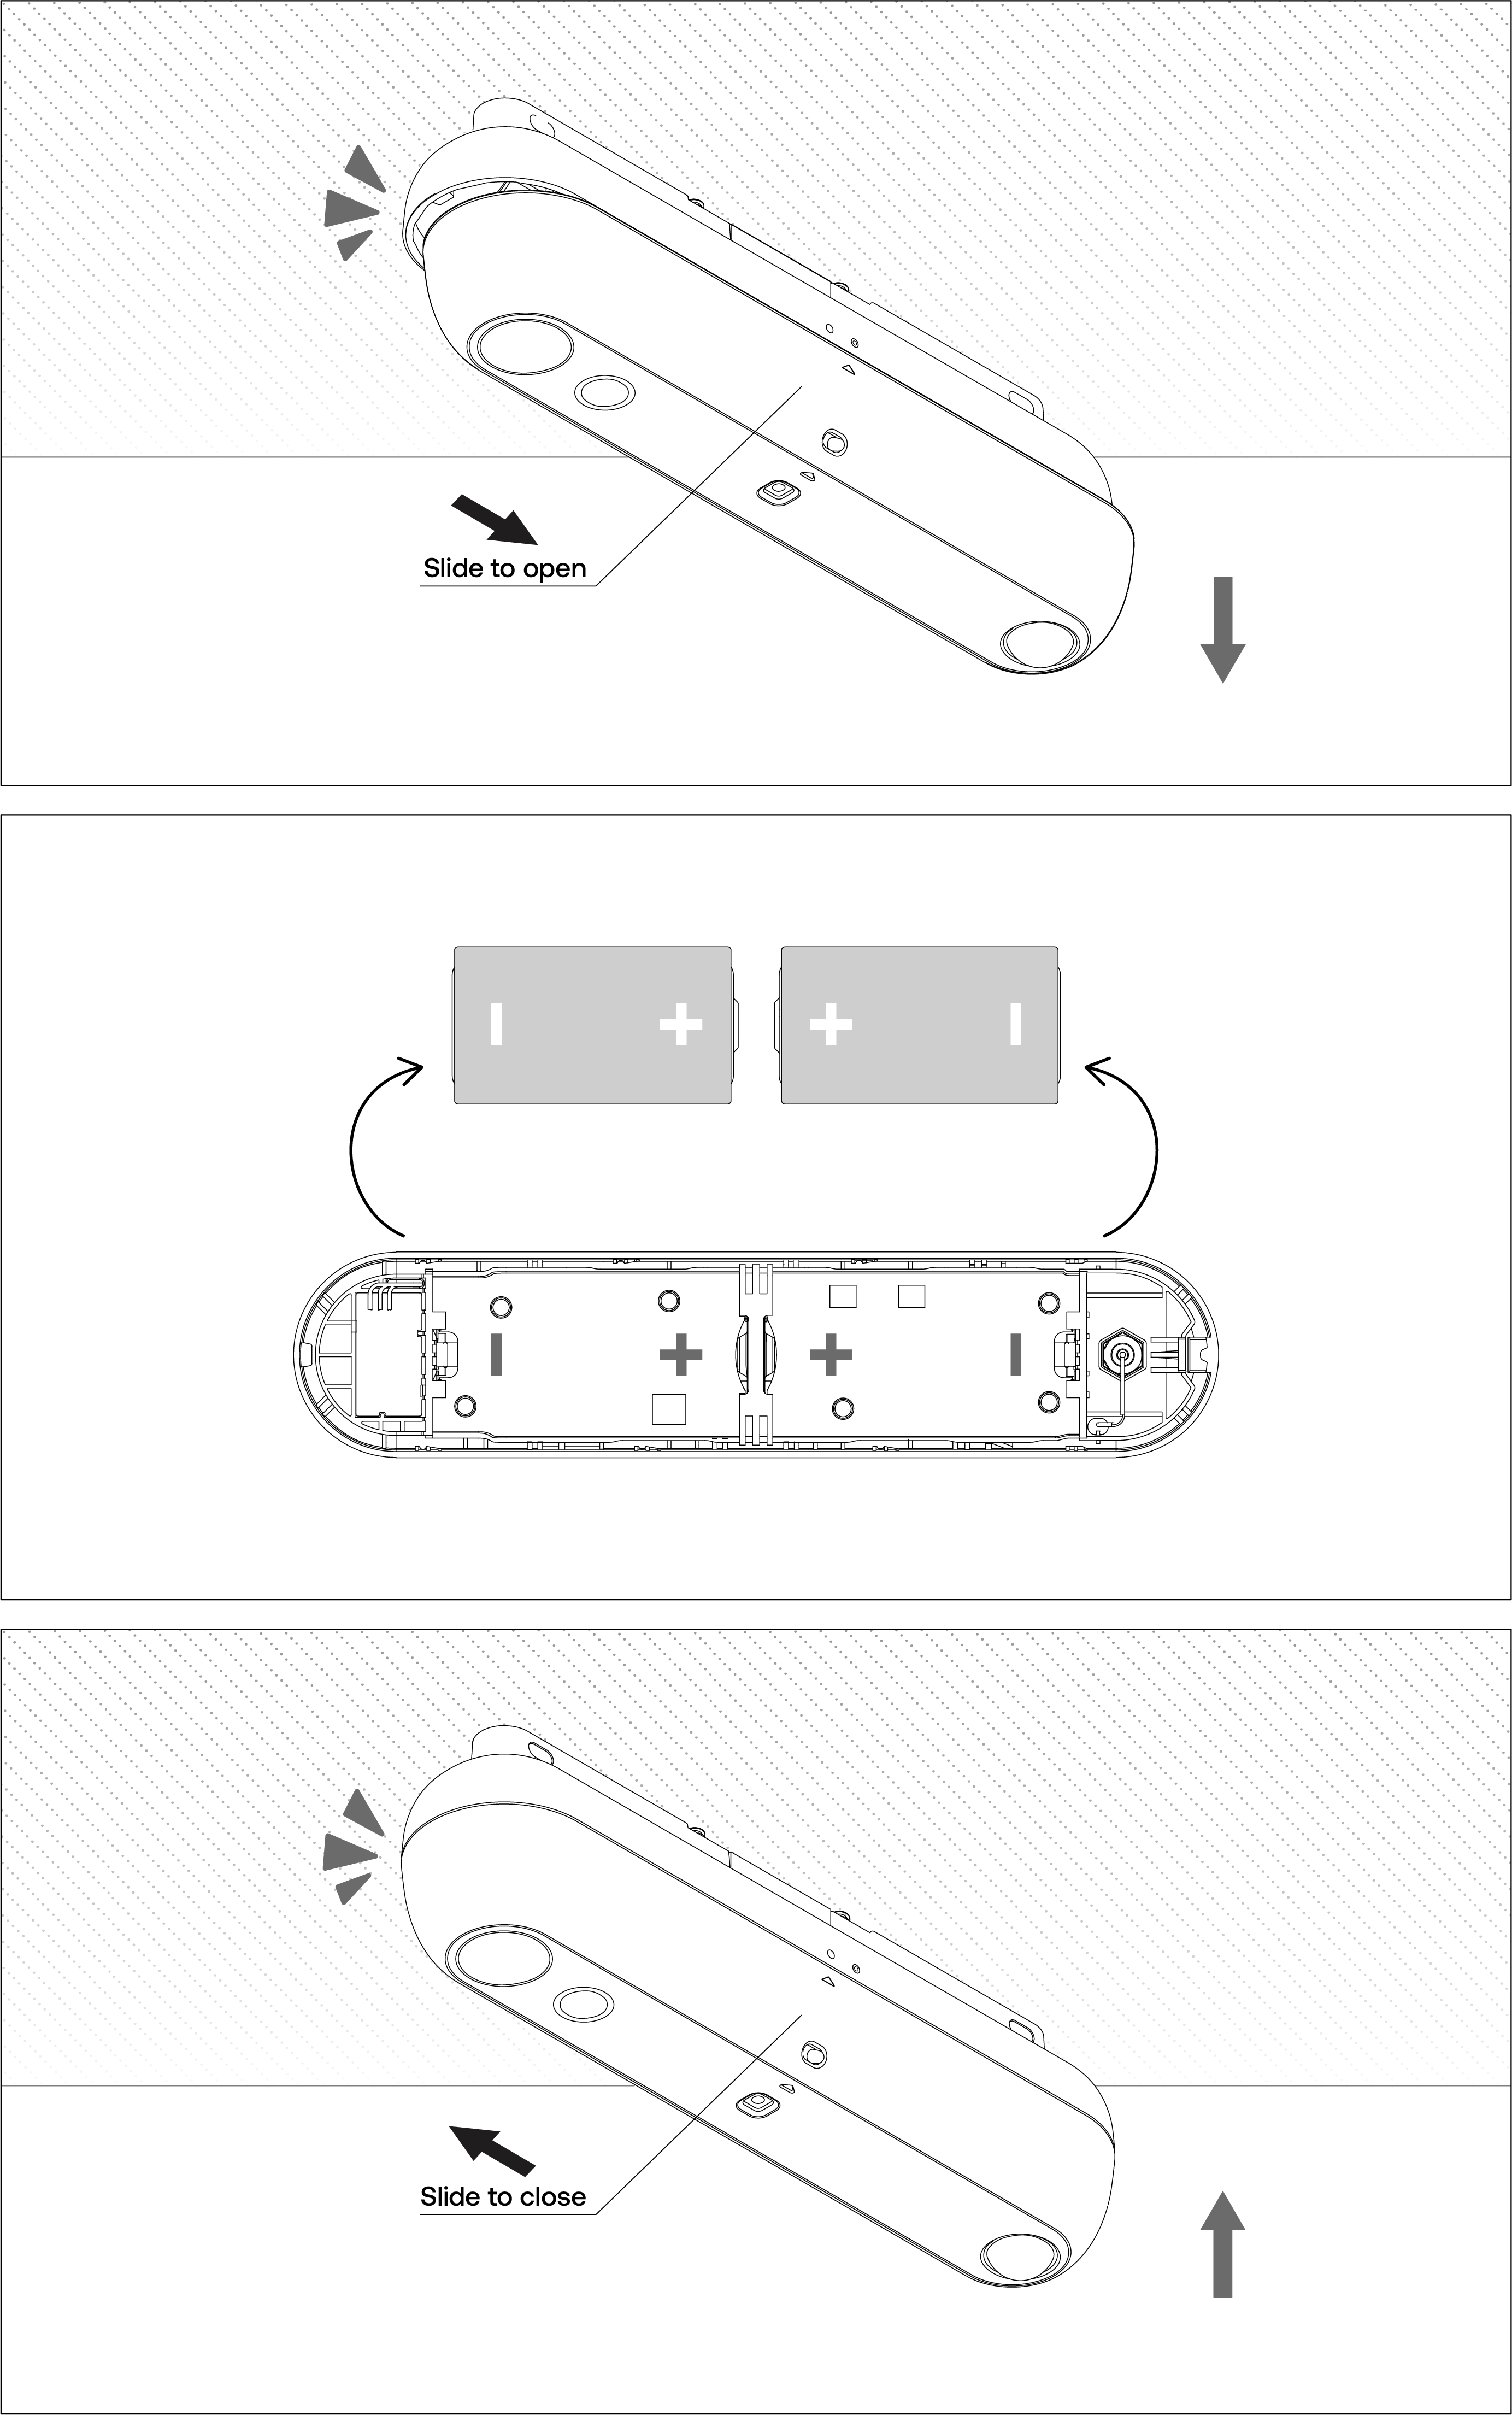
For Heatic 2+ sensors directly screwed into the ceiling from the back:
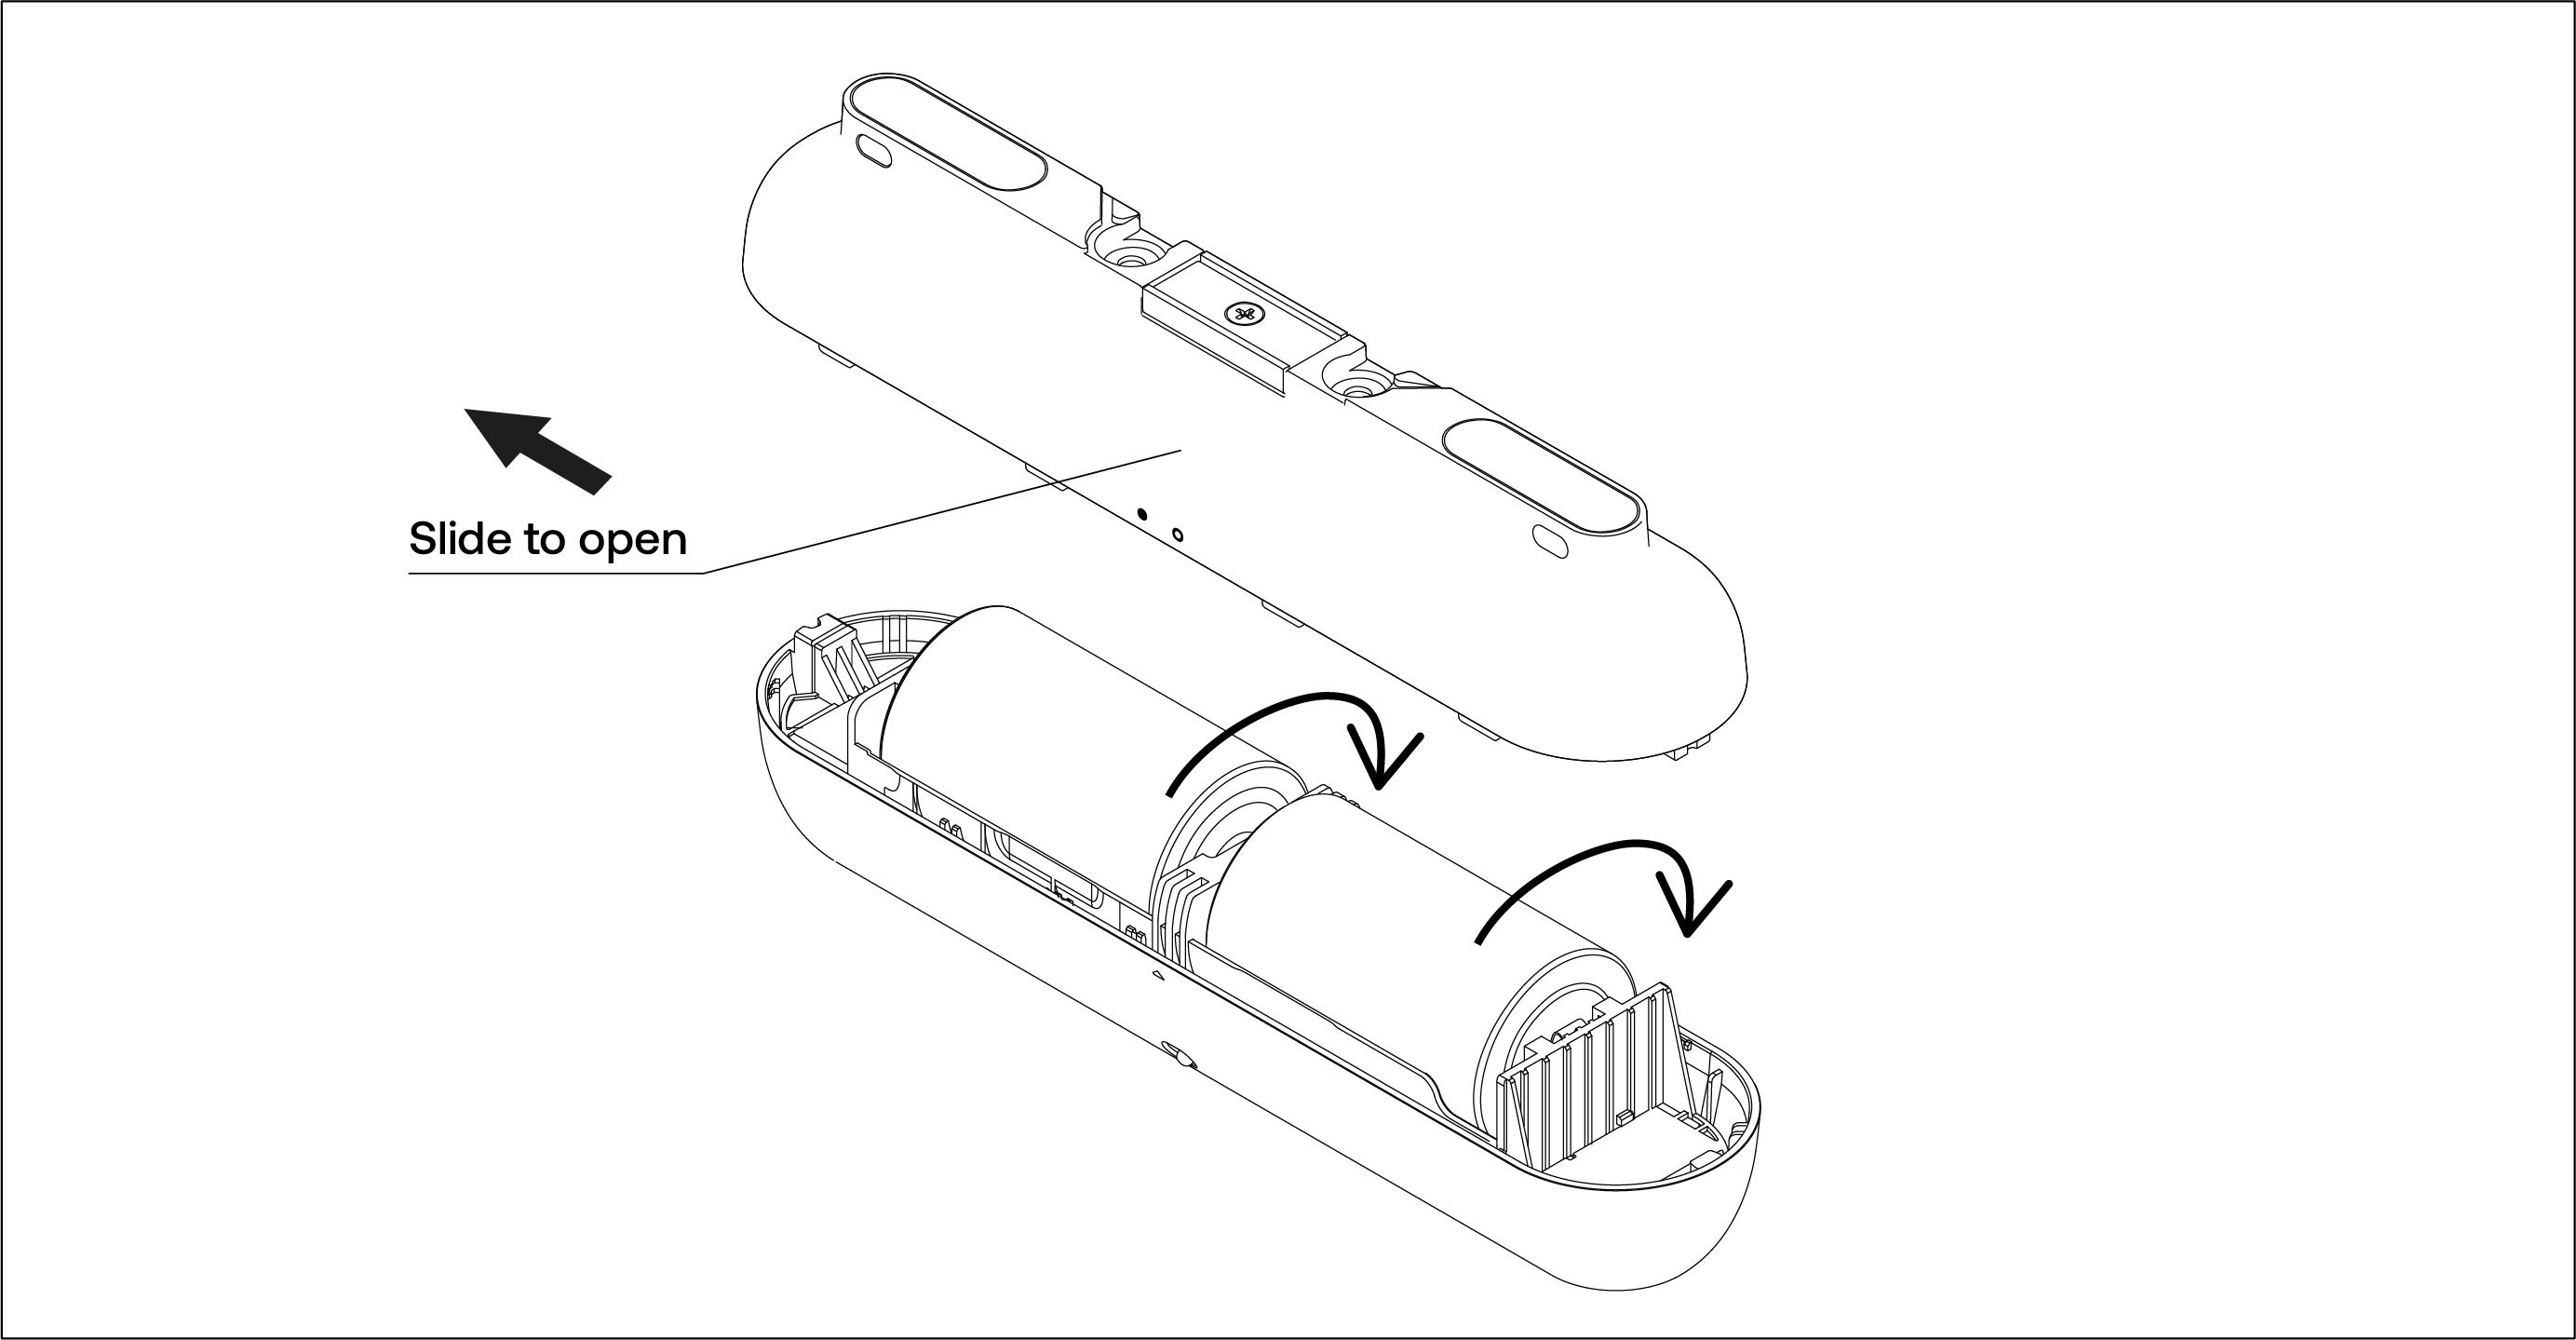
- Slide open the main housing of the sensor.
- Replace the batteries in the battery housing.
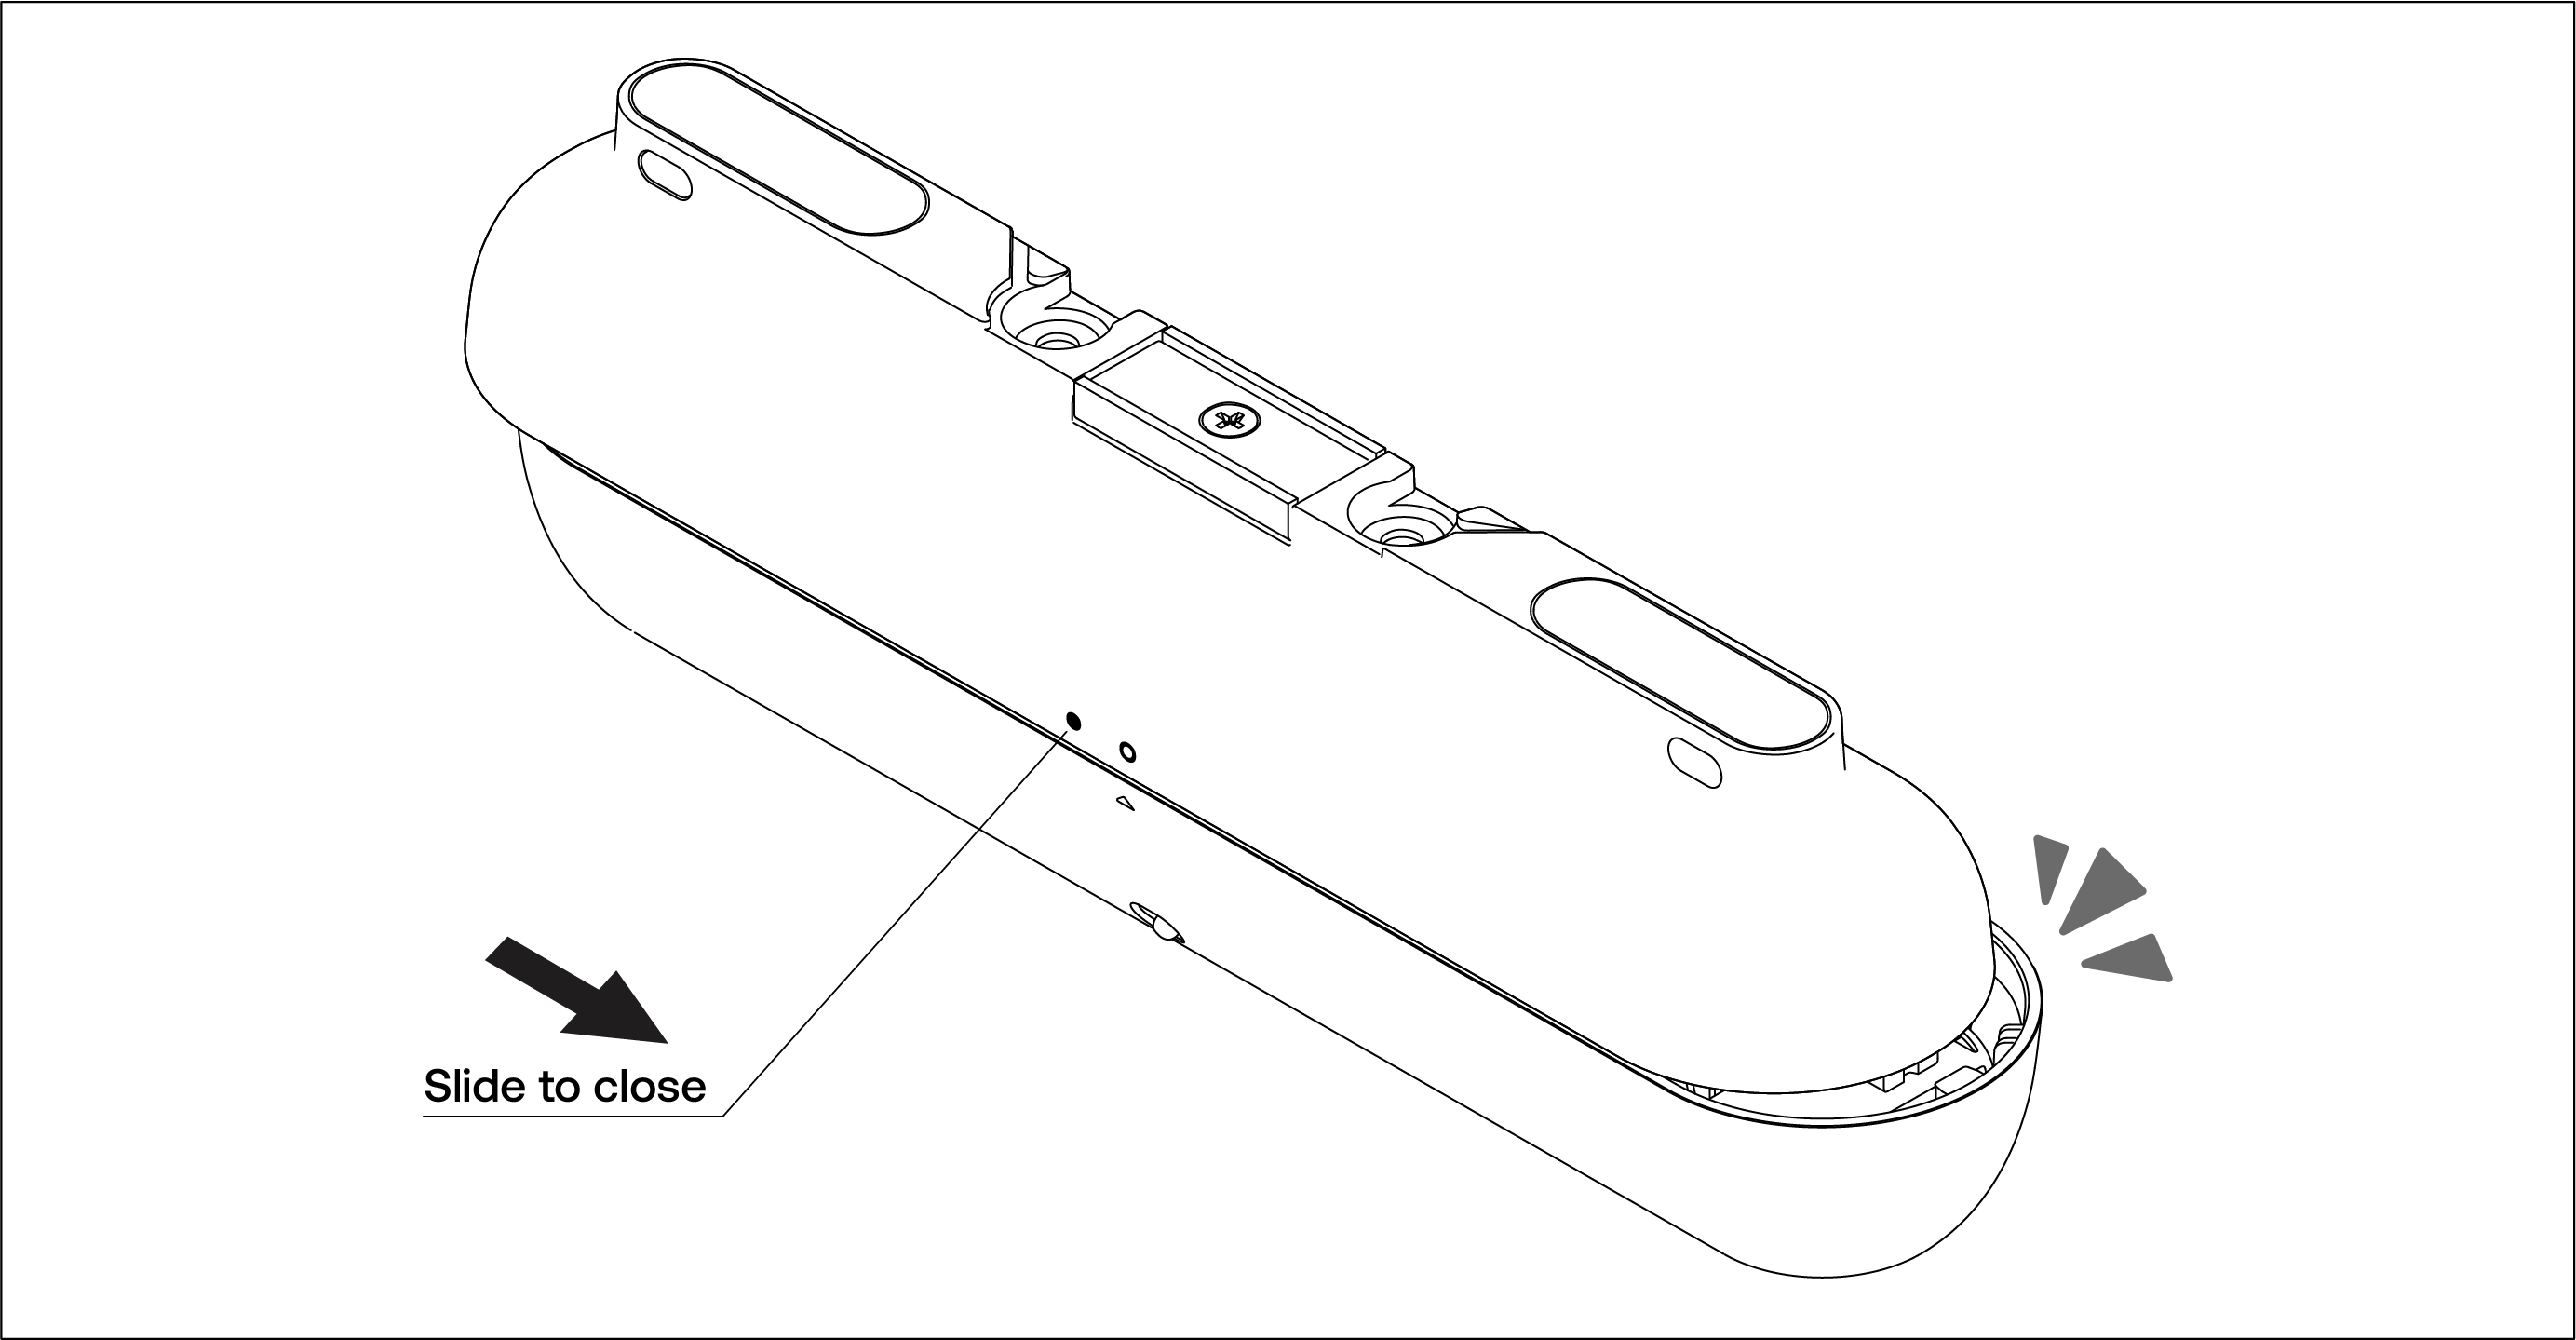
- Reattach the main body to the base, which remains secured to the ceiling.
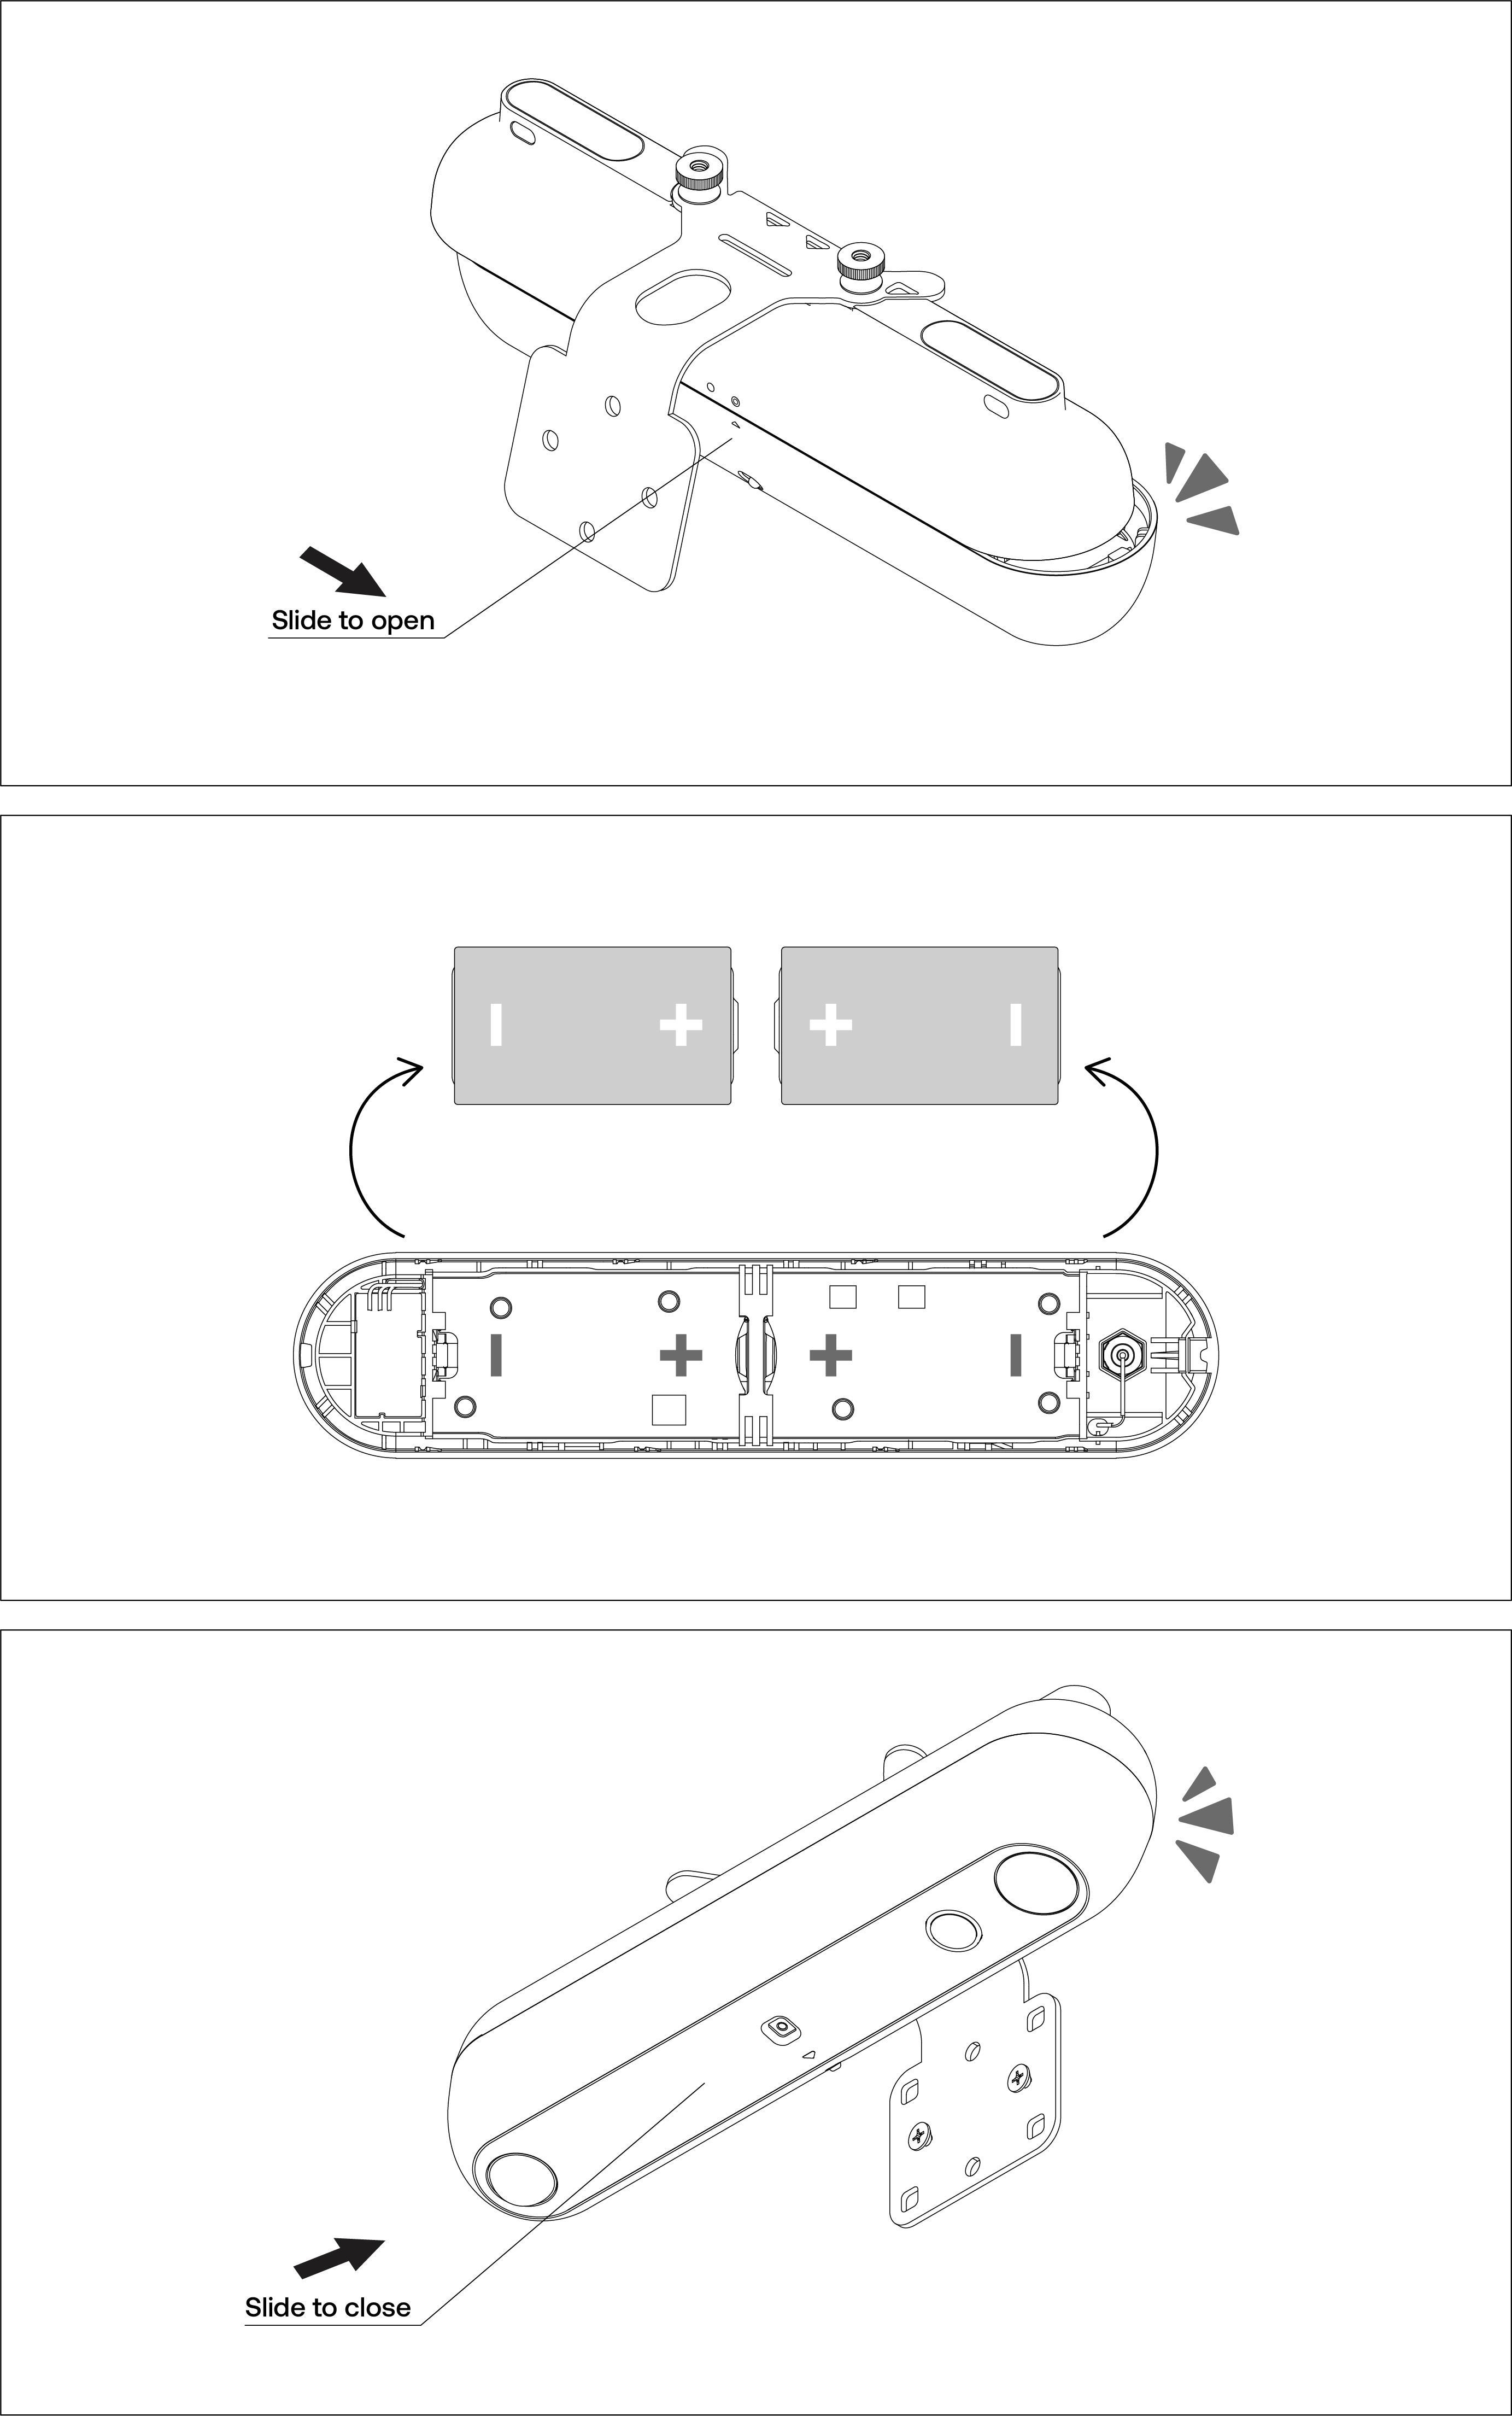
For Heatic 2+ sensors attached to Wall Mounts or Drop Rods with tamper-proof fasteners:
- Slide open the main housing of the sensor.
- Replace the batteries in the battery housing.
- Reinstall the main body onto the mount, ensuring it is securely reattached to the base.
Comments
Please sign in to leave a comment.